Wednesday, March 17, 2010

Please welcome my Dad - new to blogging! heymorandphotography.blogspot.com

On March 2nd, my Dad celebrated his - let's call it a "milestone" - birthday. He's a wonderful high school science teacher at T.L. Hanna HS in Anderson, SC (home of "Radio") who loves teaching and his students. He began teaching when I was 15 - a second career for him, but one to which he is certainly well suited. He's that crazy science teacher who goes to some extremes to make the kids talk about his class - like getting cow's hearts from the butcher to dissect on Valentine's Day or swabbing the drinking fountains in the hallway to see what bacteria from them will grow in a petri dish. Of course what they don't realize, is that although they think he may be a little "unorthodox" - they are learning. And that's what makes him a great teacher.

For as long as I can remember, Dad has also always been behind a camera. Every major event in our lives has been documented by him - willingly or not :) In the beginning he had a decent film camera and a tripod, and every family photo consisted of "just one more" shot until he got the right one, while the smiles of my mom, sister, and I turned into blank stares and signs of frustration. You've never seen so many eye rolls captured on film until you've seen our family photo albums!

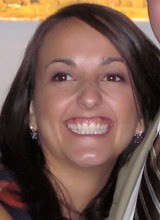
Over the years his skill has gotten better, his equipment has become more sophisticated, and his "eye" for a great shot has gotten sharper. I think part of this was fueled by his interest in taking photos of his students at their sporting events. It was in the high school arena that he really started to capture great sports action shots. His photos now are nothing short of stunning. A byproduct of his new thirst for photography is also that he has gotten a little more "artsy" with his landscape photography. Beautiful scenery shots and interesting angles - he's really learning some great techniques. Not only that, but he enjoys shooting human portraits, and has a knack for capturing the sunlight in just the right spot. 

So for his "milestone" birthday, I decided to share my newfound love of blogging with him, and encouraged him to start a blog so that he could share his talent with the world. In fact, I started one for him, and with a quick tutorial he has hit the ground running! He quickly picked up how to watermark his photos (as he does sell his sports photography) and enjoys getting reactions from his subjects and observers alike.

Please check out his blog HERE and especially view his previous posts. Most of his photos for now are of student sporting events but his Yosemite Vacation post has some beautiful scenes. His post on his favorite photos has a wide variety of great shots from over the years - and even features a pseudo-celebrity :) I'll also feature his photos in a few months after My Best Friend's Wedding in Panama, as she has asked him to be the photographer.

To amend the movie-ending quote from the movie Radio (if you haven't seen it, you should),
"So if you're ever in Anderson on a Friday in the fall, get there early. You'll see the man they call Morand...snapping photos of the Yellow Jackets as they take the field."

Happy Birthday Dad; I look forward to you sharing your talent with the blogging world!


Tuesday, March 16, 2010

Cork board how-to

I promised this a few weeks ago when I finished my Kitchen Message Center, and I'm only now getting around to posting a quick little how-to. Been busy these days - sorry!

Basically I found this old piece of art in the basement left from the previous owners. Ugly art, but nice frame!


A close-up of the frame: (the basement is not that dusty - that's sawdust from another project!)


So, if you have a great frame like this, by all means use it. Or I'm sure you can find something similar at a flea market or thrift store for a few dollars.

Pop off the artwork from the frame. Mine was a stretched canvas that was merely attached to the frame with brads - popped off in a cinch!

Clean up your frame and give it a light sanding.


Give it a coat of good quality primer. I used a brush, but you could also use spray primer.

No photos for the next steps (I got carried away with the project!). 

Pick up a roll of cork from a home improvement or craft store.


Cut the cork to the exact size of the canvas. Then use spray adhesive and cover the entire surface of the canvas. Lay the cork onto the canvas and rub all over to make sure there are no air bubbles. I let this dry face down so that the canvas and cork would lay flat.

While this dries, spray paint the frame with whatever color you like. I used a white semi-gloss. Make sure to get all the surfaces of the frame that you will see when it hangs on the wall. My frame needed 3 coats. 

Once the frame is dry, simply re-attach the canvas to the frame by popping it in the back, and securing it with brads. If you don't have a handy electric or pneumatic brad-nailer, I'm sure you could just hot glue the canvas inside the frame - being sure to wipe away any glue that squeezes out in the front.


Ta-da! A beautiful new cork board. I am considering taking mine apart again and covering the cork with burlap. Still deciding.


Posting on:


Sunday, March 14, 2010

Devil's Food Cake with Mint-Chocolate Ganache


We had a family dinner party to attend tonight, and recently polished off the last sleeve of Thin Mints. That of course led to the decision for what kind of dessert to make today - Devil's Food Cake with Mint-Chocolate Ganache! My old trusty friend never fails me :)


This was the very first recipe I ever made from Martha Stewart's Baking Handbook and the success of it made me fall in love with her all over again. 

Martha Stewart Living Omnimedia, Inc.

The book is wonderful - for anyone who doesn't own it - not at all intimidating and very easy to follow. Even the most difficult recipes come out stunning.

Anyway, this recipe is tried and true and it get the same reaction every time - delicious! My husband doesn't care for mint chocolate (I know, I know - how did I ever marry him!?!?), so I considered simply leaving out the peppermint extract from the ganache, but I decided for the good of the group that the flavor should stay, and I'm glad I did. One day I'll make one just for him :)

Here's the recipe:


Devil's Food Cake with Mint-Chocolate Ganache

Makes one 9" layer cake

3 sticks butter, room temperature, plus more for pans

¾ cup Dutch-processed cocoa powder, sifted, plus more for pans

¾ cup hot water

¾ cup sour cream

3 cups cake flour (not self-rising), sifted

1 tsp baking soda

½ tsp salt

2 ¼ cups sugar

4 large eggs

1 tbsp pure vanilla extract

Mint-chocolate ganache (recipe to follow)


Preheat oven to 350 degrees. Butter two 9-by-2-inch round cake pans; line bottoms with parchment paper. Butter parchment; dust with cocoa powder, taping out excess. In a medium bowl, whisk together cocoa and hot water until smooth. Whisk in sour cream; let cool. Into a medium bowl, sift together flour, baking soda, and salt; set aside.

In the bowl of an electric mixer fitted with the paddle attachment, beat butter and sugar on medium speed until light and fluffy, 3 to 4 minutes. Add eggs, one at a time, beating to combine after each; scrape down the sides of the bowl as needed. Beat in vanilla. With mixer on low speed, add flour mixture in two parts, alternating with the cocoa mixture and beginning and ending with the flour; beat until combined.

Divide batter between prepared pans; smooth with an offset spatula. Bake until a cake testers inserted in centers comes out clean, 45 to 50 minutes. Transfer pans to a wire rack to cool 15 minutes. Invert cakes onto rack; peel off parchment. Reinvert cakes; let cool completely, top sides up. Transfer half of Mint-Chocolate Ganache (3 ½ cups) to clean bowl of an electric mixer; set aside remaining. Let cool completely, stirring frequently, about 40 minutes. Attach bowl to mixer fitted with a whisk attachment. Beat on medium-high speed until ganache holds soft peaks, 5 to 7 minutes.


Using a serrated knife, trim tops of cake layers to make level. Transfer one of the layers to a cake turntable or platter, and spread top with 1 ½  cups whipped ganache. Top with remaining layer, cut side down, and spread remaining whipped ganache in a thin layer over the entire cake, covering completely. Refrigerate until set, about 30 minutes.


Transfer cake to a wire rack set over a rimmed baking sheet. Pour the reserved ganache over the top, letting it run down the sides. If necessary, use a large offset spatula to spread from the center towards the edges, so that the cake is evenly and completely covered. Refrigerate until the ganache has just begun to set, about 30 minutes. Transfer cake to a serving plate, and garnish with Chocolate Mint Leaves. Serve immediately, or refrigerate, covered with a cake dome, for up to 2 days.


Chocolate Mint Leaves

18 fresh mint leaves, ¼ inch of each stem intact
2 ounces semisweet chocolate, melted and cooled

Using a small pastry brush, coat underside of each leaf with a thick layer of chocolate. (If chocolate drips onto the top of the leaf, gently wipe it away with your finger)

Drape the leaves, chocolate sides up, over the handle of a wooden spoon set on a parchment-lined baking sheet. Refrigerate until set, about 10 minutes.

Gently grasp the chocolate layer of each leaf with kitchen tweezers. Holding the stem, peel off mint leaf. Chocolate leaves can be kept in an airtight container in the refrigerator for up to 2 days.


Mint Chocolate Ganache

4 cups of heavy cream

2 lbs of best-quality semisweet chocolate, finely chopped
¼ cup light corn syrup

¼ tsp salt

1 ½ tsp peppermint extract


In a small saucepan over medium-high heat, bring the cream to a full boil; turn off the heat. Add the chocolate, and swirl pan to completely cover with cream. Slowly whisk mixture until smooth. Add the corn syrup, salt, and peppermint extract, and stir until combined. Transfer to a clean bowl.

Enjoy!

Wednesday, March 10, 2010

Lemon Cake

We had Jim's sister and brother-in-law over for the Oscars on Sunday. It was create-your-own panini night - delicious! I also whipped up a little dessert that I've made before and happened to have the ingredients on hand. Light and citrusy to get us ready for spring!


This Lemon Cake recipe came from a cookbook my sister gave me called Auburn Entertains. One of those spiral bound books that you see in gift shops in small towns, this book is a large collection of recipes contributed by members of the Auburn community and friends of Auburn University. Lots of fabulous recipes by traditional southern women and men, perfect for entertaining, southern style.

When my in-laws moved from Philadelphia to Raleigh, NC, my mother-in-law told me this great quote she heard, about how to be a southern woman.
"A good southern woman always has three casseroles in the freezer. One ready if someone dies, one ready if someone has a baby, and one ready if you just have too many cocktails in the afternoon." Just another reason why I have a special place in my heart for the real southern way of life!

I'm not normally a fan of cake mixes, but I found this recipe one day last summer when for some reason I really wanted to make a moist lemon cake. I scoured all my cookbooks until I came upon this recipe. It was delicious, and so easy.

Anyway, the recipe. Enjoy, and WAR EAGLE!


Lemon Cake

1 package Lemon Supreme (Duncan Hines) cake mix
1 package lemon jello
3/4 cup cooking oil
3/4 cup water
4 whole eggs
1 teaspoon lemon flavoring
Dash of salt

Preheat oven to 300 deg fahrenheit. Mix cake mix and jello. Add oil and water. Beat eggs one at a time. Add lemon flavoring and salt. Cook in floured, greased tube pan. Cook 1 hour, or until a cake tester comes out clean. Take out of pan while hot. When cooled, mix the juice of 2 lemons and 1/2 box confectioners sugar, and pour over top of cake.

I thinly slice a lemon and decorate the top of the cake with the lemon slices.


Tuesday, March 9, 2010

Philadelphia Flower Show

Spring is coming! I can feel it. The sun is shining, the birds are singing, and the two feet of snow on our property is finally melting away. To get ready for the new season, I convinced Jim to head into center city with me for the Philadelphia Flower Show on Friday night. Loved it! Picked up some great seeds, artwork from a favorite artist, and some gorgeous pussy willow branches. Loved seeing all the vendors and their crafts, and with all the pamphlets and business cards I picked up, I look forward to exploring what else they have to offer. 

Only took a few photos, but I think they're pretty enough to put you in the mood for sunny days ahead!

Loved the display by Terrain, and look forward to visiting their location when I find some time in the coming weeks.

Lovely tulips

I really loved this prize-winning floral arrangement. Nice and exotic!

Makes you want to sit out in the backyard, no?

An interesting display of flowers in colored water, all suspended by wires from the ceiling.  Really beautiful in person.

Looking forward to our daffodils, azaleas, and forsythias coming into bloom...

Such pretty colors.

In addition to all the gorgeous blooms, everything smelled wonderful! The hyacinths were delicious!

Always stunned by the beauty of a pure white phalaenopsis

Hello spring! I'm waiting for you :)